Full instructions are set out in the Instructions for Use (IFU) that are included with every purchase of DermaClip and can be downloaded here.
Contraindications:
The device should not be used on patients with known allergies to skin adhesives.
Do not apply the device under excessive tension or on wounds that cannot be easily approximated, as skin shearing, blistering, or device release may result.
Do not use on infected wounds unless specifically determined appropriate by the attending physician.
Do not use in areas on wounds where the device cannot be fully adhered to the skin.
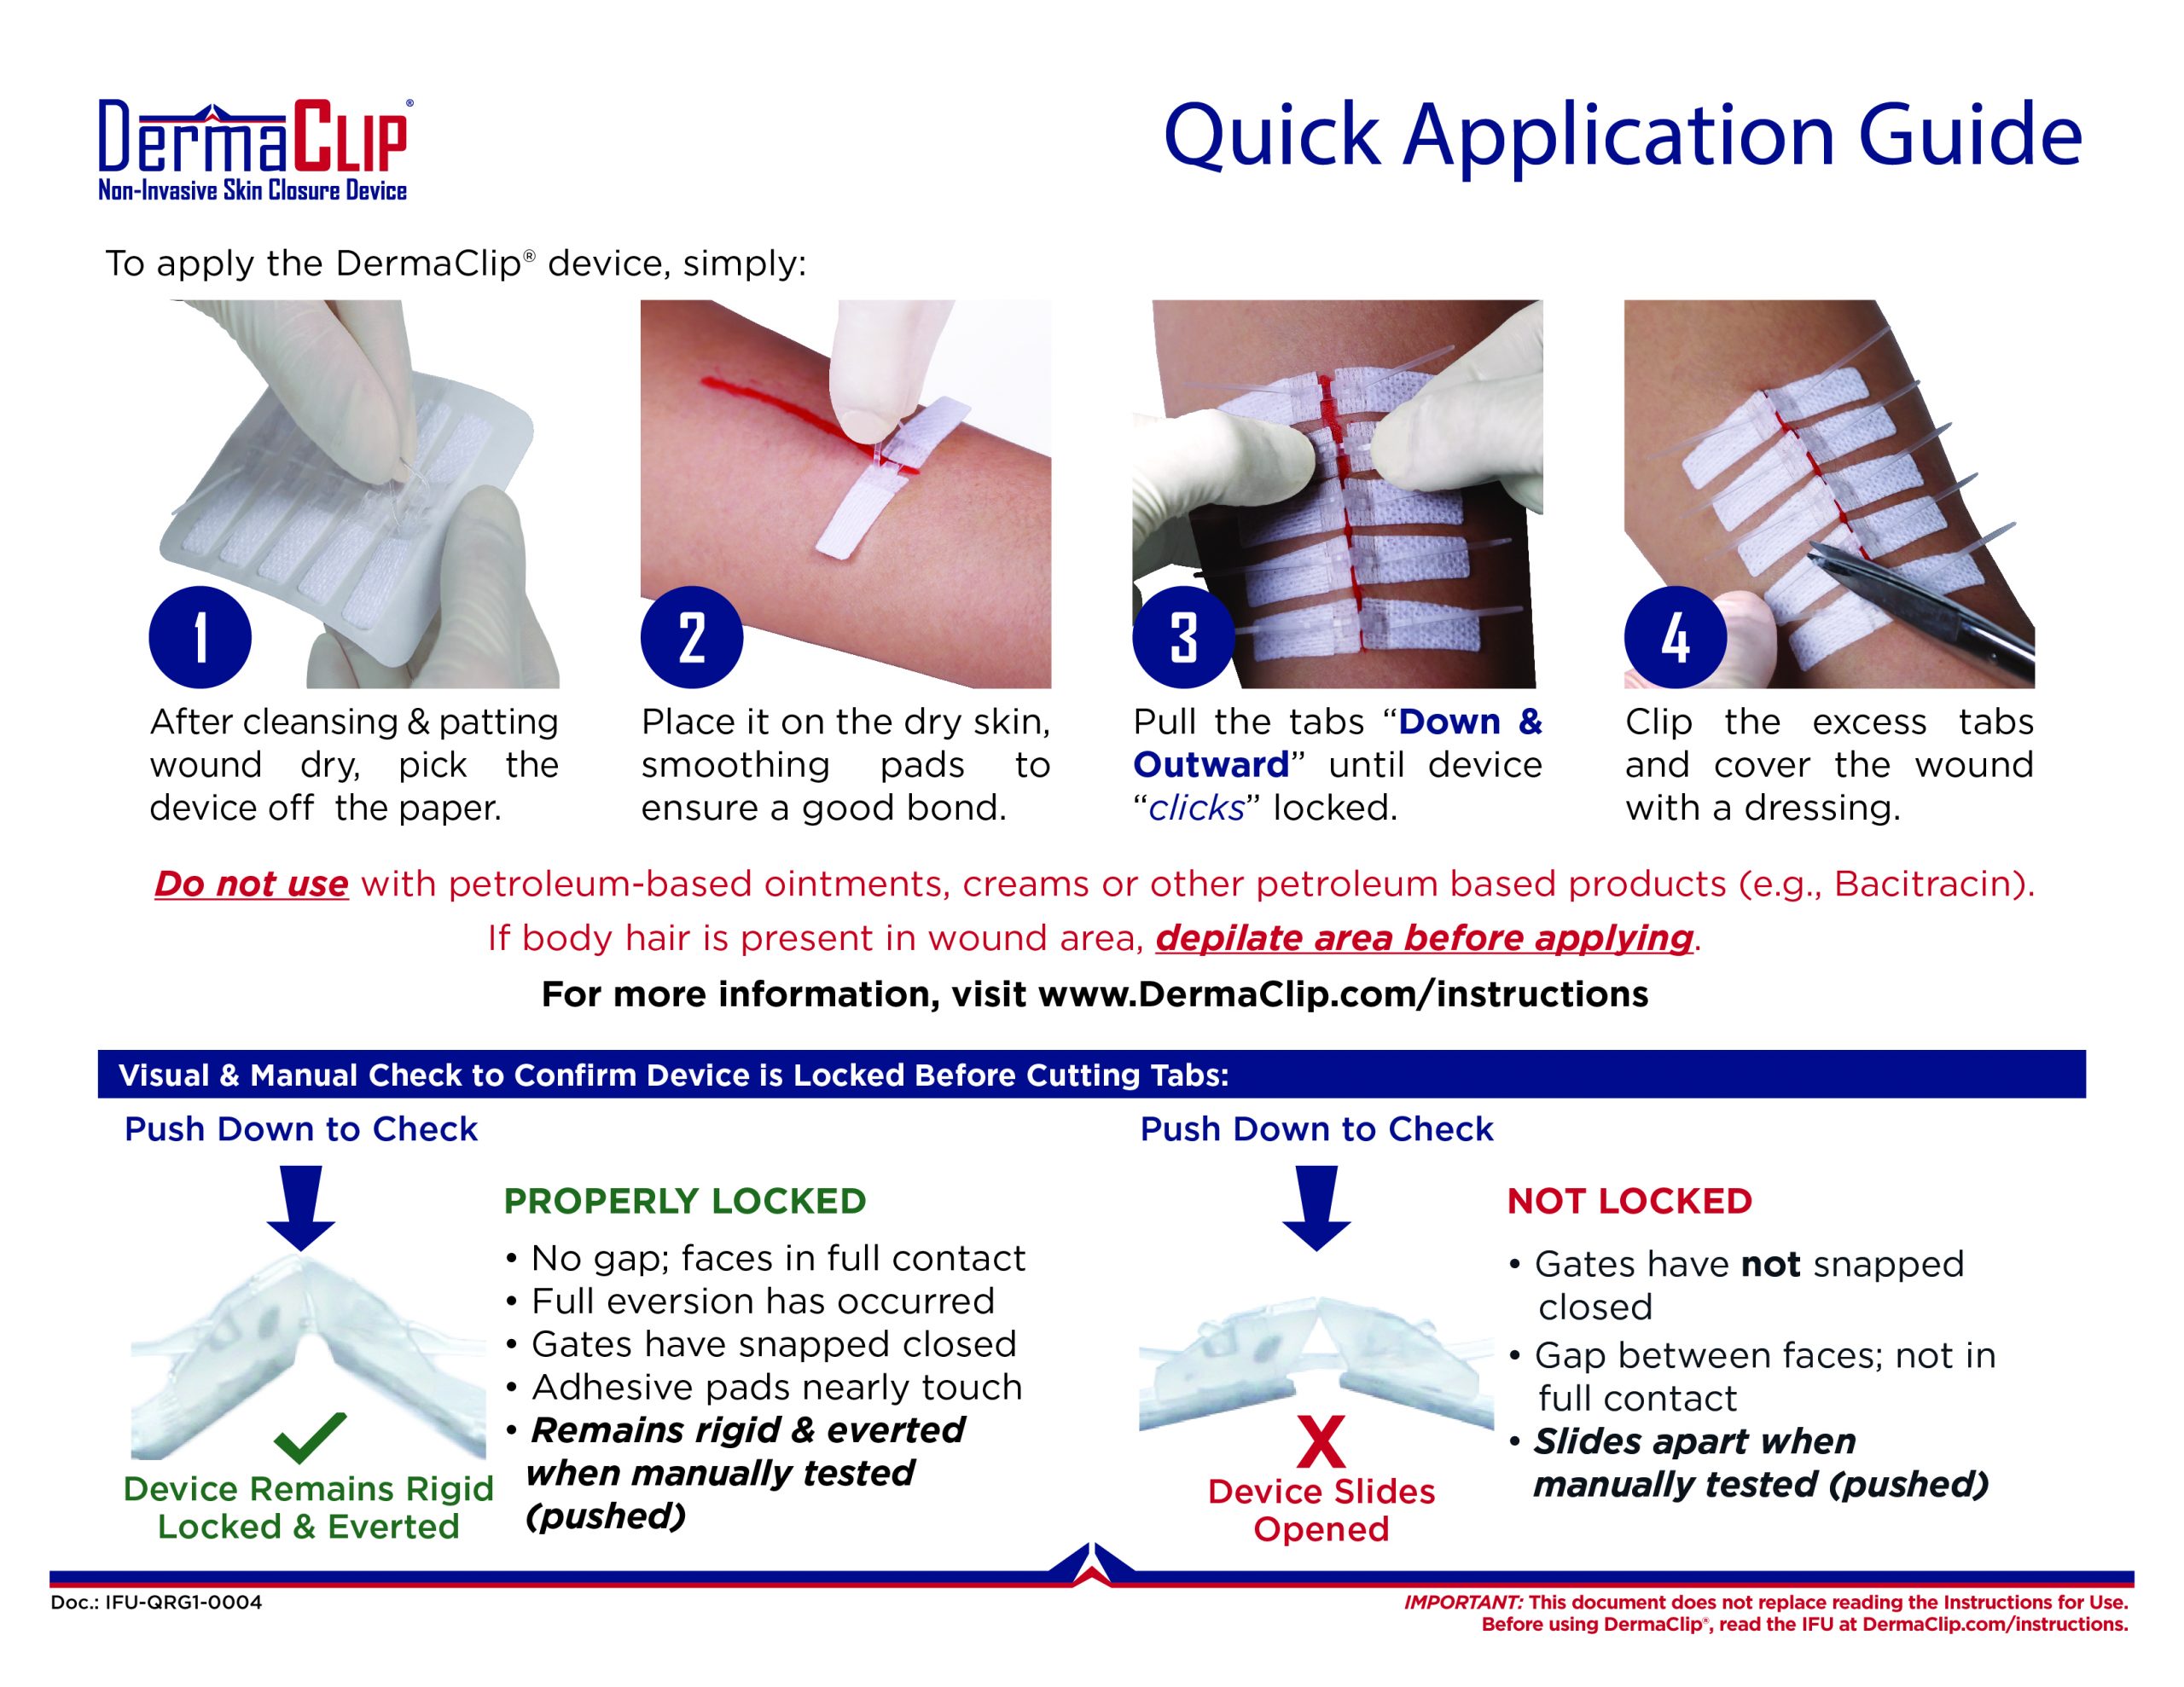
Do not use within the hairline unless the area has been depilated before applying.
Note: The DERMACLIP Extreme is not Suitable for use on Fragile or Damaged Skin. For individuals with these types of skin issues, utilize the standard dermaclip products.
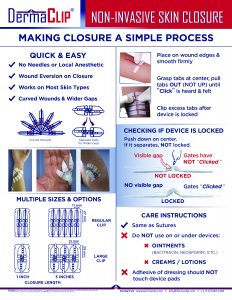
CLEAN
DermaClip needs to be applied to CLEAN, DRY skin
Use normal protocols for cleaning the wound area
Ensure area is dry before applying devices
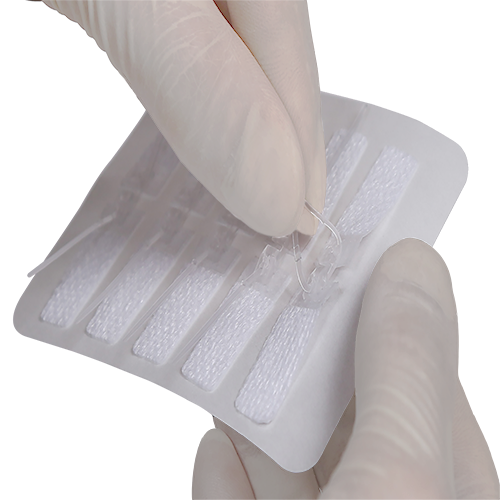
PICK
Remove the devices from the sterile packaging
Select a DermaClip, pinch the pull tabs towards the center, then lift it off of the backing paper
Make efforts not to touch the skin / tacky side of the adhesive to ensure the strongest adherence once applied
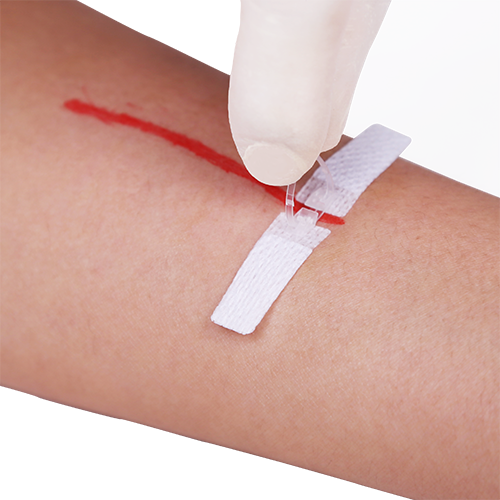
PLACE, PRESS FIRMLY
Center the device across the wound
Place each pad as close to the wound edge as possible without crossing into the wound
FIRM PRESSURE IS REQUIRED TO ACTIVATE THE PRESSURE SENSITIVE ADHESIVE. THIS WILL ENSURE THE DEVICE ADHERES TO THE SKIN
WITHOUT PRESSURE, THE DEVICE COULD FALL OFF PREMATURELY
Place multiple devices 1 to 4 mm apart until the wound is covered
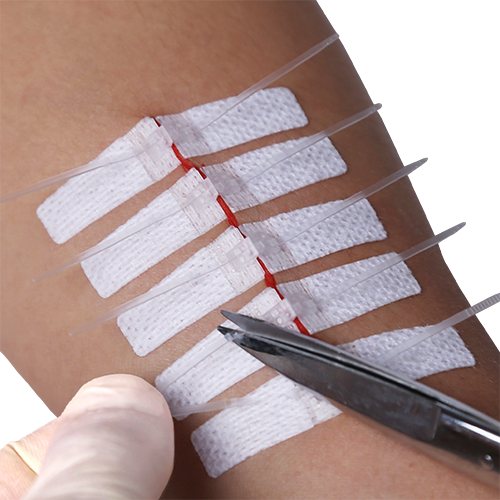
PULL
Once the length of the wound is covered, pull the tabs on each DermaClip in opposing directions to lock
A “click” is heard and felt when locking shut
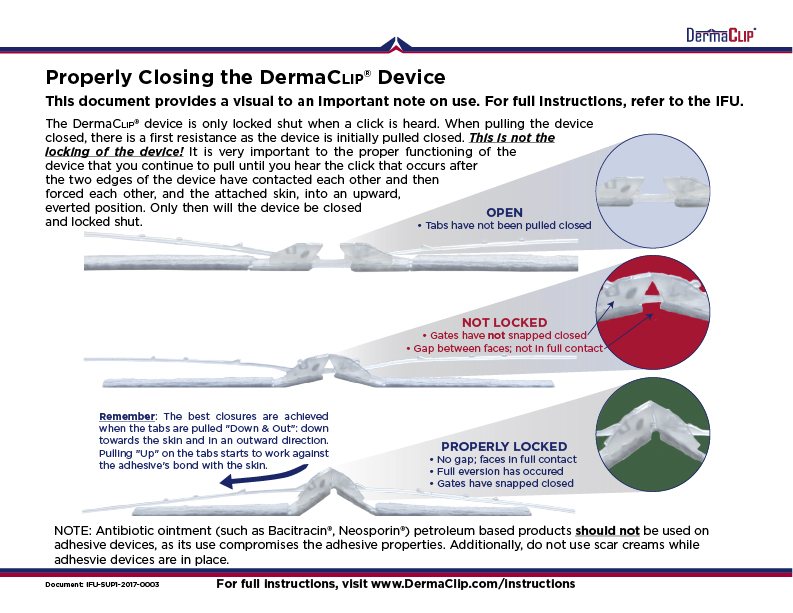
The best closures are achieved when the tabs are pulled “Down & Out”: down towards the skin and in an outward direction.
PULLING “UP” ON THE TABS STARTS TO WORK AGAINST THE ADHESIVE’S BOND WITH THE SKIN.
Make sure hear the “CLICK” is heard to assure the device is locked shut.
IMPORTANT: There is a first resistance as the device is initially pulled closed that then releases. THIS IS NOT THE LOCKING OF THE DEVICE!
It is very important to the proper functioning of the device that the click occurs after the two edges of the device have made contact and then forced each other, and the attached skin, into an upward position. Only then will the device be closed and locked shut.
CUT TABS
For convenience and comfort, cut the excess pull tab
Ensure the device is locked before cutting pull tab
Cover the wound area with a dressing
Ensure any adhesive or tape used to cover devices does not adhere to the DermaClip devices
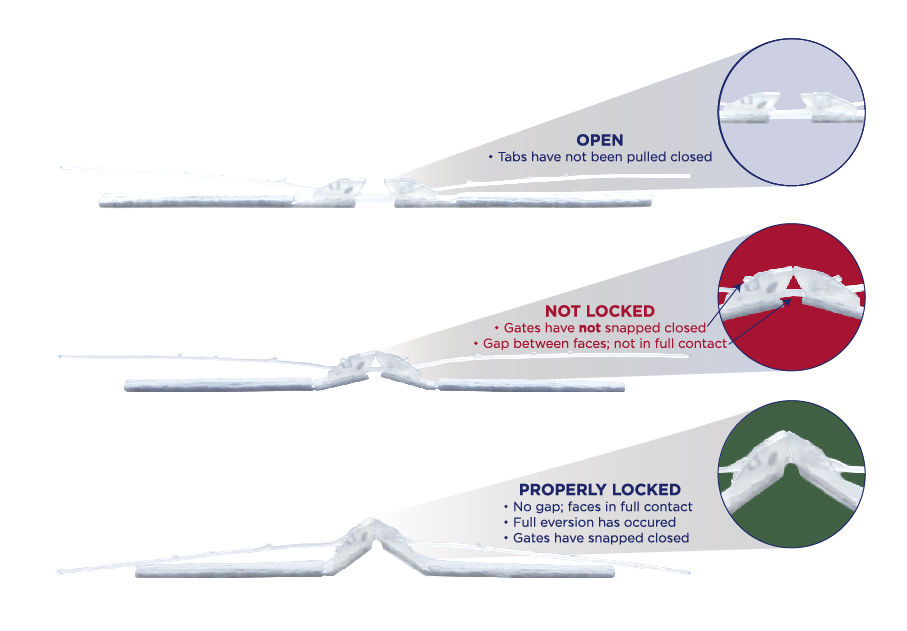
To provide a visual aid to support the warning on locking, the image below shows the different positions as the device is closed
When locked properly, the angled faces of the DermaClip device have made contact and then forced each other into an upward, everted position.


, THUMBNAIL")